Procedure

Step 1 |
User clicks on button “Create Layer” in the “Layers” panel toolbar.
|
Step 2 |
“Create layer” dialogue windows pops-up. By default a new TAB layer is proposed by system. To create a shapefile layer, click on button “Choose”
|
Step 3 |
File menu appears. User selects the desired directory and type the file name (with or without extension; “.tab” or “.shp”). The “Save as type” default value is “MapInfo Layer”. To save file as shapefile, switch “Save as type” to “ESRI SHP Layer”. User clicks “Save” to return to the “Create layer” dialogue window.
|
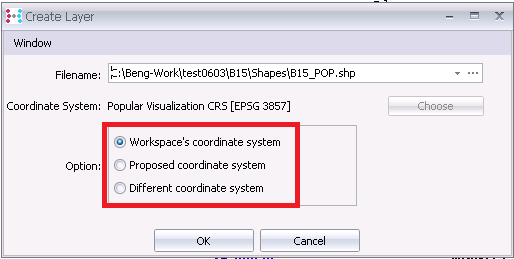
Step 4 |
Next, user selects the coordinate system and ends by clicking “OK”. Clicking “Cancel” aborts the whole operation; neither shapefile nor TAB file is created.
Option: Workspace’s coordinate system Layer to inherit the projection of the workspace.
Option: Proposed coordinate system Layer to inherit system proposed projection. System looks up to the projections of the layers top-down opened in “Layers” panel, and the first projection found which is not equal to the workspace projection, is chosen as the system proposed projection.
Option: Different coordinate system Layer to inherit projection chosen by the user. User clicks “Choose” and chooses the desired projection from the projection list. |