Record Multiple Virtual Interfaces in a device within a single port / interface

Description
This example shows how to record details of multiple virtual interfaces assigned to a single physical port, including the assignment of IP address and VLAN tag to each virtual interface.
Procedure
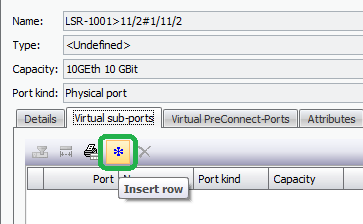
1. Create Virtual Sub Ports (VSP):
a.After creating the device and physical port, add VSP’s in the “Virtual sub-ports” tab of the Port details. The Port details can be accessed from the Ports tab of the Network Interface / Card details, or the IP/Ethernet Configuration tab of the Network Element / Mux or Network Interface / Card details.
b.When creating each VSP, it must be assigned to a Network Interface / Card in the same device. This can be a controller or management card if appropriate
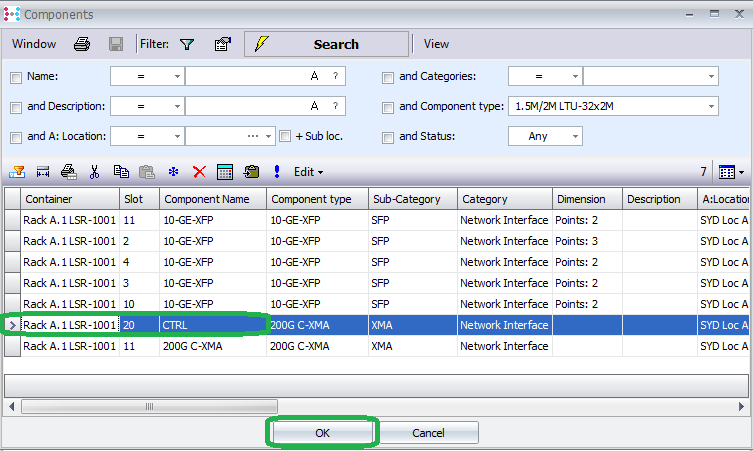
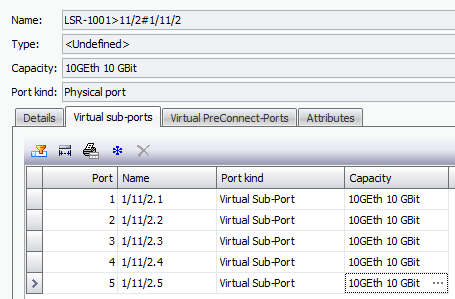
c.Repeat to create the number of VSP’s needed. All additional VSPs are assigned to the same Card (e.g. controller card) automatically.
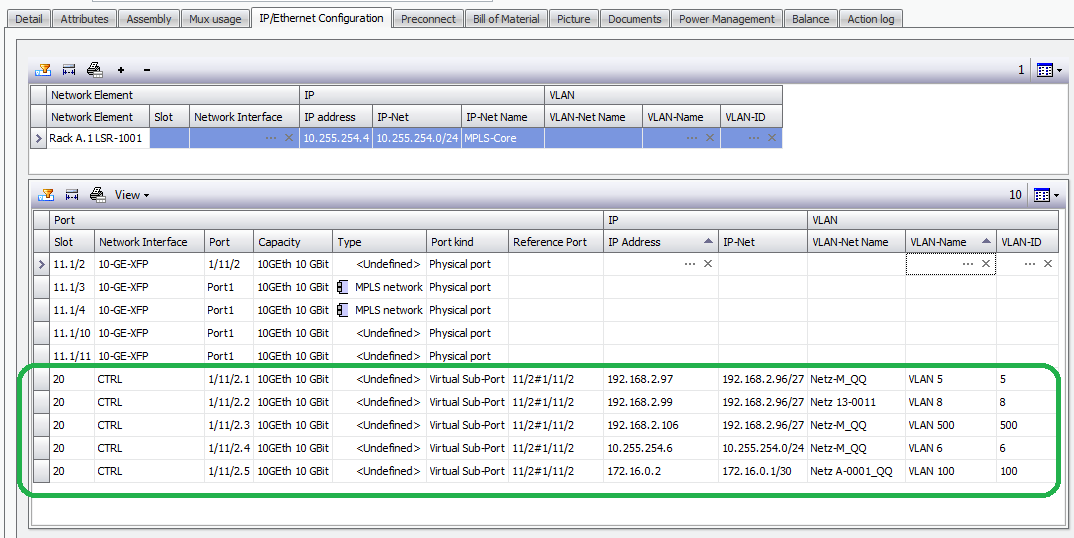
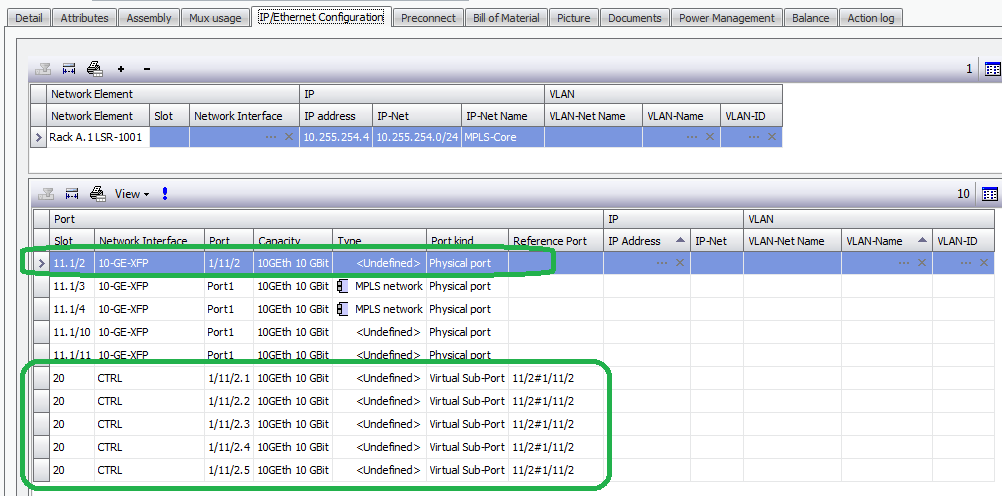
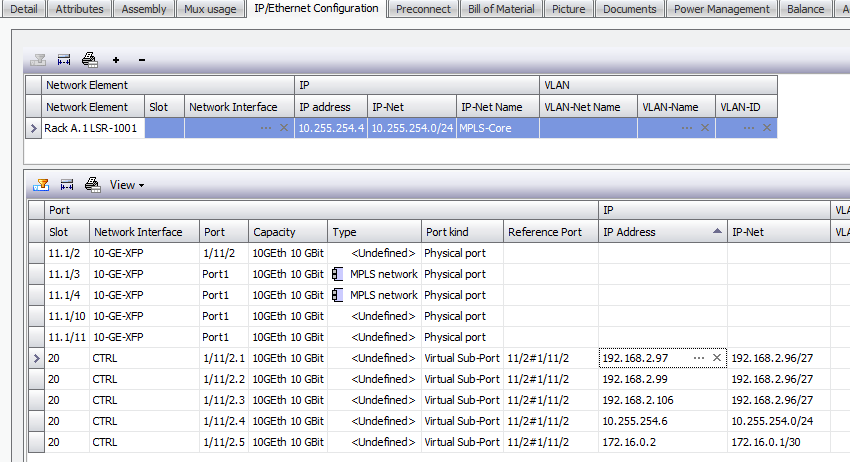
d.The resulting IP/Ethernet Configuration tab of the Network Element /Mux detail shows the physical and virtual ports plus the references between them.
2.Assign IP address details to VSPs
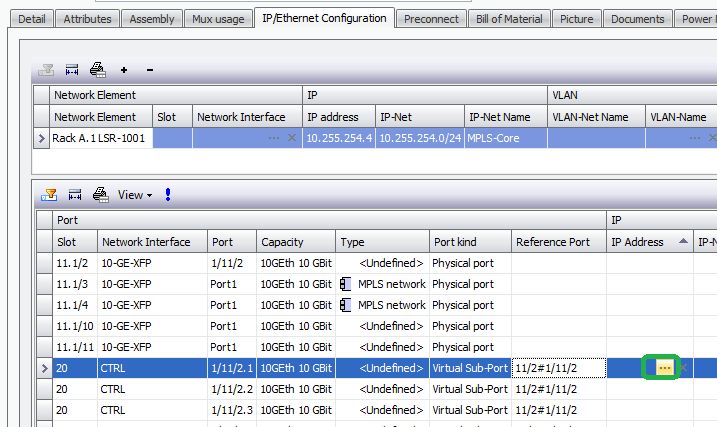
a.From the IP/Ethernet Configuration tab, assign IP addresses from a defined range/pool of addresses via the IP Address field.
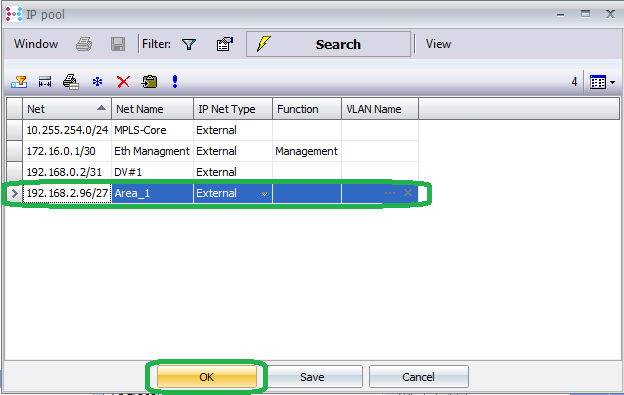
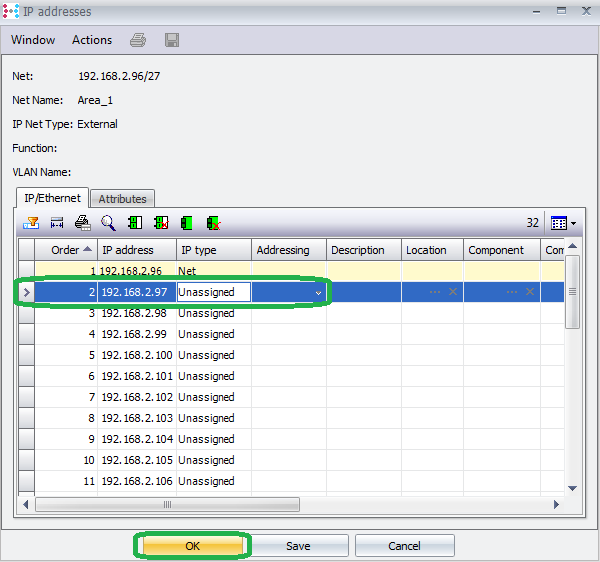
b.Select the IP Net with the address to assign from the pool window and click OK.
c.If needed, unhide the unassigned addresses using the button as shown.
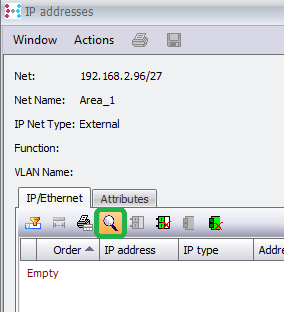
d.Select the IP address to assign and click OK.
e.Repeat for each VSP that needs IP Address information assigned. The addresses can be assigned from any of the defined IP Nets.
f.The resulting IP/Ethernet Configuration tab shows the assigned IP Addresses.
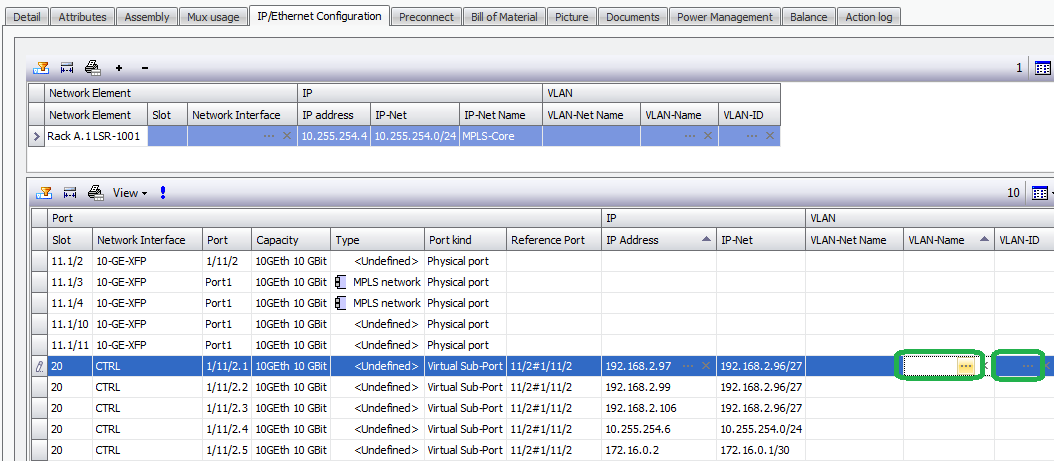
3.Assign VLAN tag details to VSPs
a.From the IP/Ethernet Configuration tab, assign VLAN Tags from a defined range/pool of VLANs via the VLAN Name or VLAN ID fields.
b.Note that if a VLAN been assigned elsewhere in the system previously, it can be directly selected from the resulting list of VLANs. If not, then select a new VLAN.
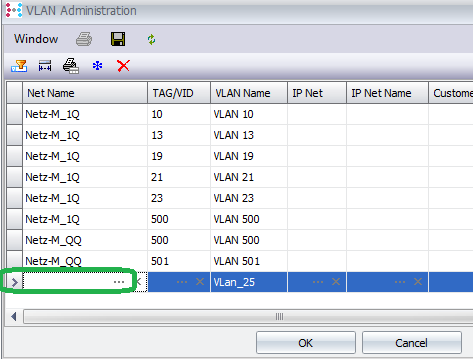
c.To create a new VLAN in the pool / Select a new VLAN, click on the “Create VLAN Pool” button in the VLAN Administration window.
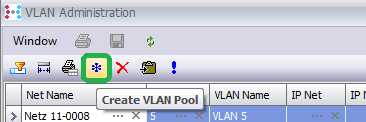
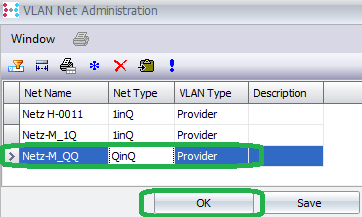
d.In the new row, use the “Net Name” field to select the VLAN Net.
e.Select the VLAN Net and click OK.
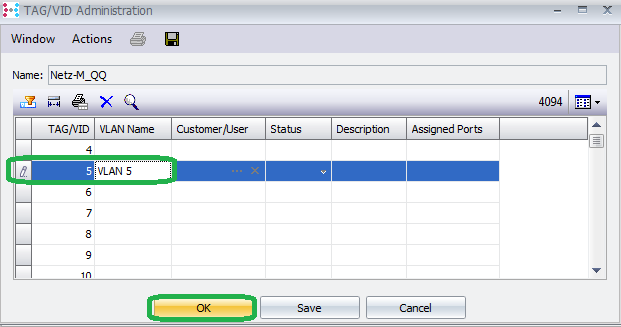
f.Use the TAG/VID field to choose the VLAN from the pool, or edit the name to simply set a label.

g.If using the pool, select the VLAN TAG/VID, update the VLAN name as appropriate and click OK.
h.Repeat for each VSP as appropriate.
i.The resulting IP Ethernet Configuration tab shows the VLAN Net and Tag information.