Splice Type icon representation

i.Select Graphic Group
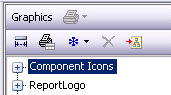
File > Library > Other > Graphics
Select existing Graphic Group or create a new Graphic Group to group the icon
To select existing Graphic Group, simply select on the group
To create a new Graphic Group, Add > Add Graphic Group
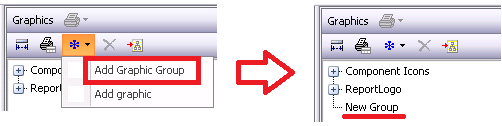
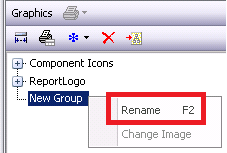
To rename Graphic Group, right click on it and select “Rename” or after clicking on the Graphic Group, click on F2.
ii.Create icon
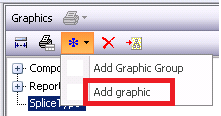
After selecting a Graphic Group, create the icon
Add > Add graphic
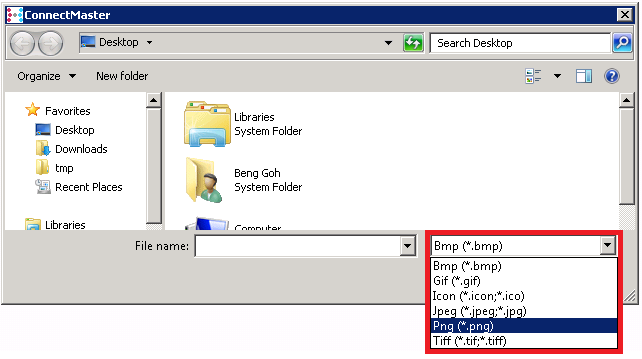
Within the “Open file” dialogue box, select the desired graphic file format (e.g. bmp, gif, png, etc.)
Note:
If no Graphic Group is selected while creating a new icon, system will show the following error message:
•
iii.After icon is added to Graphic Group, it automatically takes the filename as the icon name in ConnectMaster.
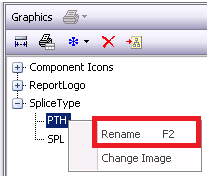
To rename icon name, right click on it and select “Rename” or after clicking on the icon, click on F2.
iv.To assign icon to splice type (Overwriting default splice type icons with new icons)
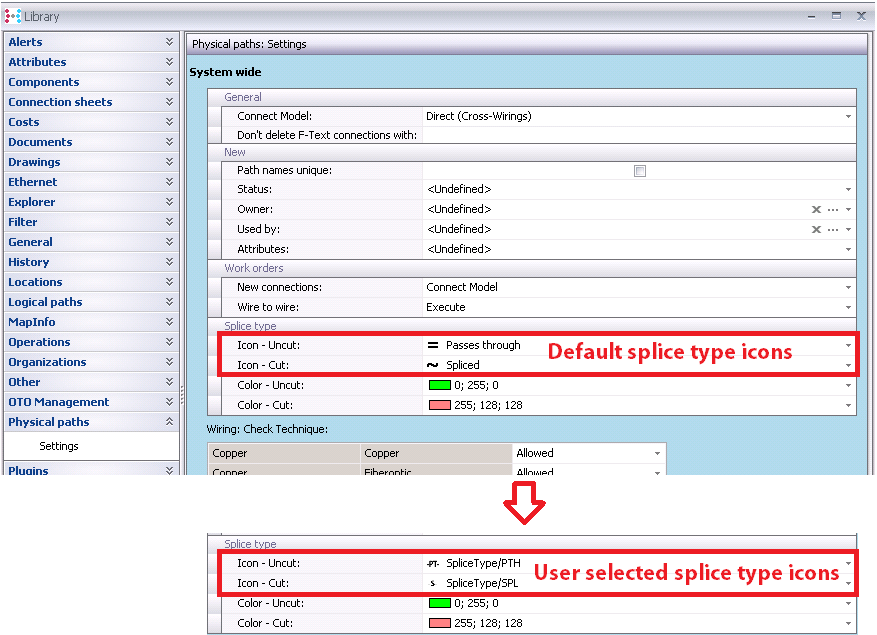
File > Library > Physical paths > Settings > Splice type
v.Example: Connection Sheet of a cassette component
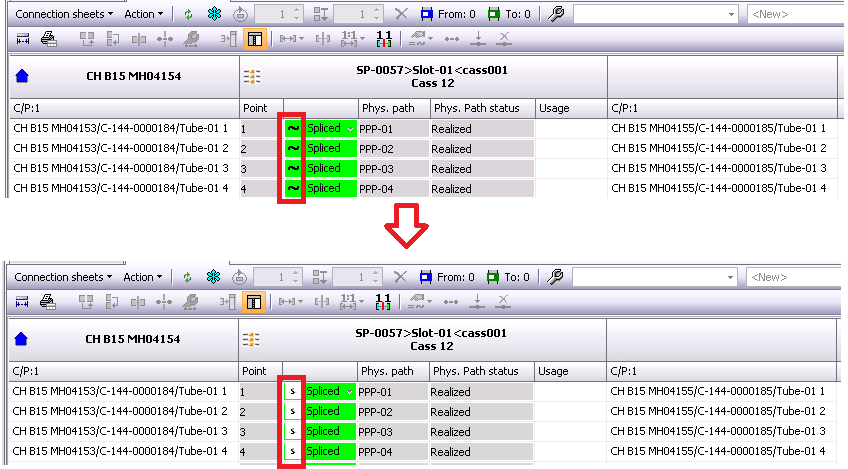
Note: The splice type names “Spliced” and “Pass through” in Connection Sheet do not inherit the icon name and are fixed.