DevExpress
General
DevExpress includes the editor program for the so named extra reports as well, so that the customer can alter the included standard reports or create new ones on his own.
In the standard case a large range of reports is included that only need to be installed.
Standard reports
Install
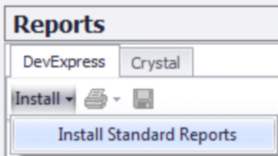
Install the standard reports via Install->“Install Standard Reports“.

Description: Short description of the menu
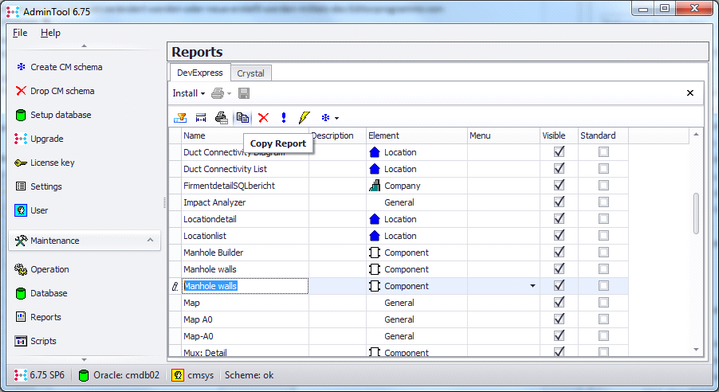
Element: Reports that are linked to an object, are directly called up via these objects. Which object type the report is linked to, is shown in the element column.
Menu: General reports that are not linked to objects are called up through a menu. Which menu, is described in the column menu.
Visible: Is shown as a choice in the print menu of the according area.
Standard: This report is used as a default for printing
List of all Standard reports
Abschalt-Management |
Map-A0 |
Schacht Wände |
Arbeitsauftrag Concat |
Mux: Detail |
Schaltauftrag |
Arbeitsauftrag Trail |
Ortsdetail |
Splice Plan |
Bauteil: Liste |
Ortsliste |
Splice Plan PON |
Bauteiltyp: Detail |
OTDR |
SQL-Bericht Bauteil |
Behälter: Detail |
OTDR EXFO |
TC: Liste |
Cabinet-Cable Connectivity |
Person: Detail |
TC: Routing |
Duct Connectivity Diagramm |
Phys. Pfade Analyse |
TC: Routing / X-Connect |
Duct Connectivity Liste |
Phys. Pfade Analyse-Demo |
TC: Routing Concatenation |
Firma: Detail |
Physik. Auto-Routing |
TC: Strukturinfo |
Karte |
Physikalische Pfade: Liste |
Verbindungsblatt |
Karte A0 |
Physikalischer Pfad: Detail |
Verbindungsblatt quer |
Manhole Builder |
Projekt-Detail |
|
Customer specific reports
Standard reports can be altered or new ones can be created with the editor program of DevExpress
Note: If a standard report is altered this must be saved under a different name if it is not to be overwritten in the next update. To generate a copy the original should not be saved under a different name. A Copy should
be made using the icon![]() after selecting the report that is to be duplicated. The new report should then be renamed.
after selecting the report that is to be duplicated. The new report should then be renamed.
Edit
Via ![]() the marked report is opened in the designer for editing.
the marked report is opened in the designer for editing.
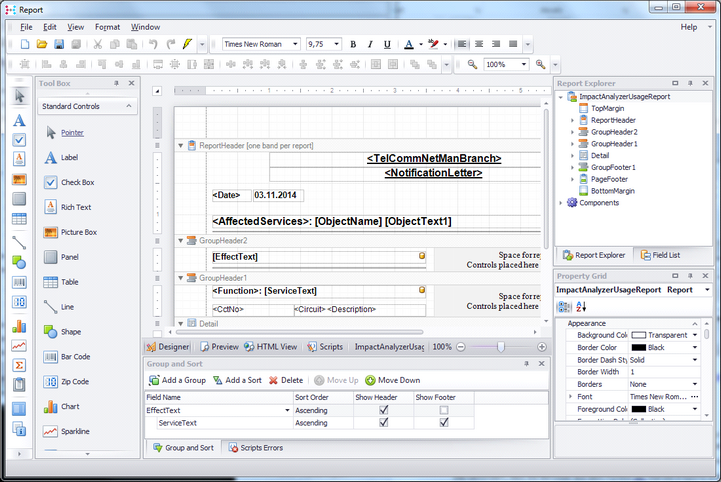
The report template not only includes the description of the form and content of the output, but also the
record set or data source. In the record set the information is contained (taken from the database) that is
needed to fill the report, independent of the exact object. This means for example in the record set of the
report Mux: Detail all the information is included that is needed to fill the report for every mux component in
the database. However the information to fill the report Person: Detail is not contained in the Mux: Detail
record set.
It is easy to acces the information of the record sets via the window field list. The information can easily be
pulled in to the main window via drag and drop and therby adding the information to the report.
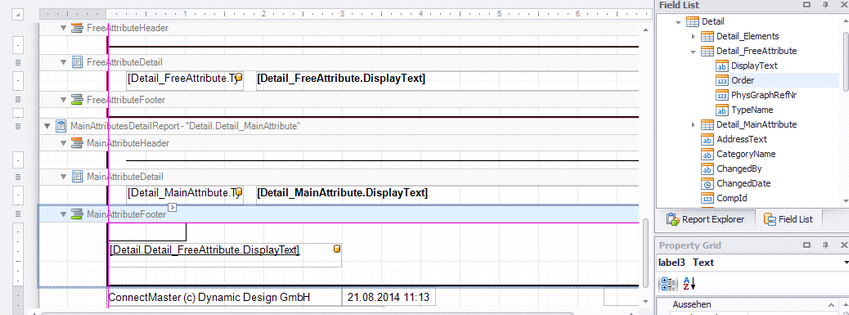
Hereby it is important that it is very easy for the user to change the format of the report as well as add static content. Altering the record set however so that additional dynamic information is available is much more
complicated and requires the help of VertiGIS Support.
Documentation
How to change the format of the report in a specific way or generate a new format is best learned on the
dexecpress website.
http://documentation.devexpress.com/#XtraReports/CustomDocument4256
SQL Reports (Object)
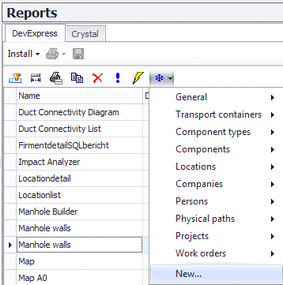
A new report is created via ![]() “new”. The name is then entered and the choice is made between Objects and General.
“new”. The name is then entered and the choice is made between Objects and General.
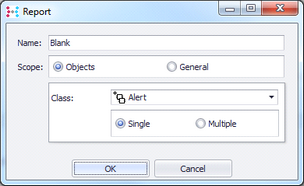
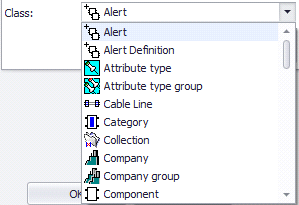
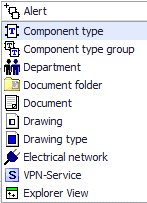
New reports that our object linked can be linked to the following 50 classes.
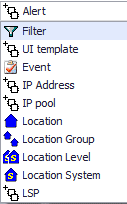
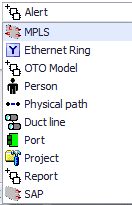
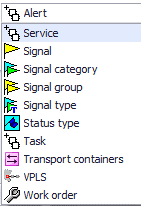
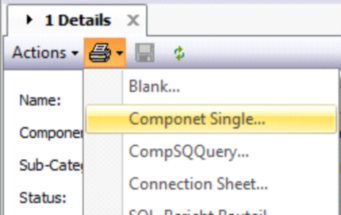
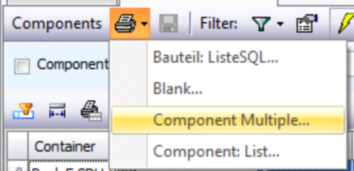
For an object linked report it can be selected if the object is Single or Multiple. By single the report is printed via the icon in the detail window (In the example below the new report is called “component single”).
By Multiple the report is started via the print icon in the inventor window (In the example below the new report is called component multiple).
SQL-Report (General)
A new report is created via ![]() “new”. The name is then entered and the choice is made between Objects and General.
“new”. The name is then entered and the choice is made between Objects and General.
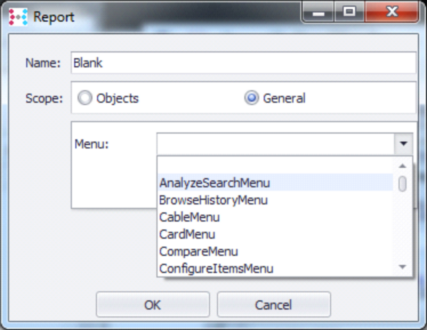
By a general report one can determine via which menu the report is called upon.
The following menus can be selected.
Options |
Menu Branch |
||||
Analyze Search Menu |
Network Analyse/Search |
||||
Browse History Menu |
|
||||
Cable Menu |
Network Inventory -> Cable/Connection |
||||
Card Menu |
Network Inventory -> Network Interface |
||||
Compare Menu |
Network Analyse/Search -> Compare |
||||
Configure Items Menu |
File -> Extras -> Menu |
||||
Contacts Menu |
Contacts |
Container Menu |
Network Inventory -> Rack/Container |
Customers Menu |
File -> Extras -> Menu ->Customize->Commands->Customize->Commands |
Custom Filter Menu |
Network Analyse/Search -> Custom |
Device Menu |
Network Inventory -> Device/Power Source |
Ethernet Menu |
Network Usage -> VLAN |
File Menu |
File |
Groups Menu |
Network Inventory -> Groups |
Help Menu |
Help |
Inventory Menu |
Network Inventory |
Lines Menu |
Network Inventory -> Lines |
Mux Menu |
Network Inventory -> Network Element |
New Visio Template Menu |
Network View-> Schema -> Visio: Vorlage |
New Window Menu |
Datei -> Extras -> Neues Fenster |
Open Viso File Menu |
Network View-> Schematics -> Visio: File |
Operation Menu |
Network Operation |
Pipe Menu |
Network Inventory -> Duct/Pipe |
Reports Menu |
Network View-> Reports |
Search Master Data Menu |
Network Analyse/Search -> Search master data |
Search Over Menu |
Network Analyse/Search -> Search dependancies |
Shaft Menu |
Network Inventory -> Pit/Manhole |
Strip Menu |
Network Inventory -> Patch Panel |
Terminal Menu |
Network Inventory -> Dynamic patch panel |
Test Comp Menu |
Test -> Components (must be activated via the bat file) |
Test Controls Menu |
Test -> Controls (must be activated via the bat file) |
Test Logical Menu |
Test -> Logical, Signals (must be activated via the bat file) |
Test Menu |
Test (must be activated via the bat file) |
Test Other Menu |
Test -> Other (must be activated via the bat file) |
Trails Menu |
Network Usage -> Section/Trails |
Tsocket Menu |
Network Inventory -> Splice/Splitter |
Usage Menu |
Network Usage |
View Menu |
Network View |
Visio Menu |
Network View-> Schematics |
Windows Menu |
File-> Extras |
Import Export
DevExpress reports can be simply exported via the “SaveAs” button in the designer.
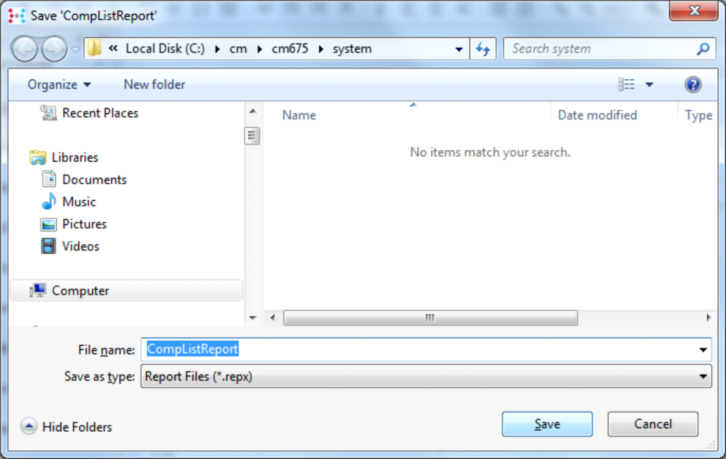
Reports can be imported via the “open” command in the Designer.

