Users management

Users
Selecting „user“ on the left menu you get into the user management. Please note that the tab „Templates“ and “Locations: extended users rights” are present only if you active the corresponding ConnectMaster
module.
User |
Contains the ConnectMaster users´list |
|---|---|
Usergroups |
Contains the list oft he user groups. |
Templates |
The list of template rights |
Locations: extended users rights |
Enable the determination of data-oriented rights for users and groups in the location system. |
Sessions |
Overview on the current connections |
User Groups
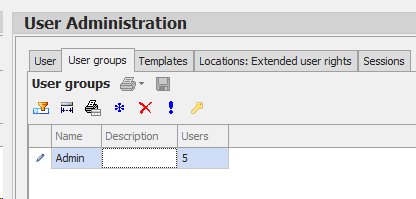
![]() User groups
User groups
The ConnectMaster-user structure requires always a user to be part to user group. Clicking on user group tab
you get into the editable user group table.
Here you can create different user groups clicking on ![]() and then on
and then on ![]() to save the changes you made.
to save the changes you made.
The list has got the following columns:
Column |
Description |
|---|---|
Name |
User group´s name . |
Description |
Description of the user group. |
User |
Shows the nummer of the users in a user group. |
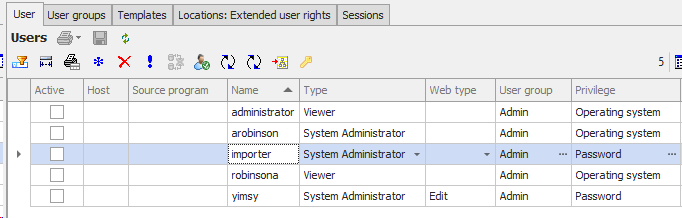
![]() User
User
In the tab user you can edit the users´properties:
Column |
Description |
|---|---|
Active |
Connection's status, User has a active session on the DB |
Name |
User´s name |
Type |
Type of user |
User group |
Shows, to which user's group belongs the user |
Privilege |
shows, how the user is authenticated to the database. |
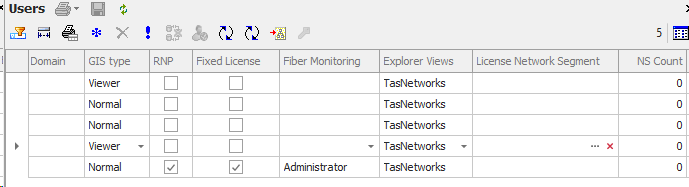
Domain |
User domain |
GIS Type |
Type of the GIS Data utilisation |
RNP |
Rights for the utilisation of the Network planners. |
Fixed License |
Assign a license to an user |
Fiber Monitoring |
Fiber monitoring privileges |
Explorer-Views |
State, which Explorer view can be seen by the user |
License Network Segment |
Network Segments configured. |
User email. |
|
Description |
Description for the user |
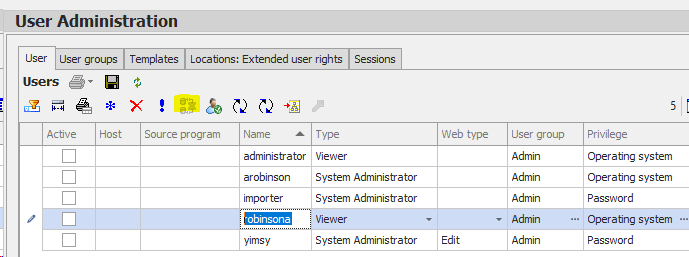
Active
Shows if there is a session for the user active on the DB, in case of sw crash a session may not be closed properly so it is still active and the user cannot reconnect to the DB and send the message

To correct this mark the user and hit “kill session” button
Name
Here the wanted user name needs to be set.
The name to use depends on the Oracle environment.
A complete Orcacle user name is composed like:
<os_authent_prefix><domainname>\<user_name>
Your Oracle-Administrator knows the details
Hint:
You are exempt from this restriction if you use password login.
Type
Under users type you can assign to an user the following right
•Viewer : the user has “read only rights” on the database
•Normal: the user has all rights (he/she can read and write on the database), but he/she cannot modify system wide settings
•Superuser: the user has all rights in ConnectMaster therefore he/she can read and write on the database and modify system wide settings.
The user is created clicking on „save“. Once the please make sure to click on “check user” in order to double
check its creation also in the oracle database.
User group
In the near column you can assign the user to a user´s group, you want him to be part, keeping in mind that a user can be a member of more than one group.
Furthermore creating user groups allow the administrator to perform a fine tuning on the user rights, being user group right a further specification, as shown by the table:
User´s Type |
right based on type |
right based on user´s group |
|---|---|---|
viewer |
Read-only |
Read only |
normal |
Write |
Specified by user´s group or users |
superuser |
Write+admin |
permissions |
Privilege
The log-on pop-up windows define, how the user is authenticated in Oracle. There are three logging on ways:
Password: in the database´s instance a password for this user is created
Local user name: the user is authenticated by the operating system, however he/she ´s not going to be double checked through the active directory
Operating system: the user is authenticated by the operating system and at the sam time he/she ´s double
checked through the active directory.
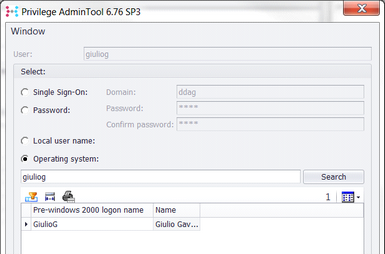
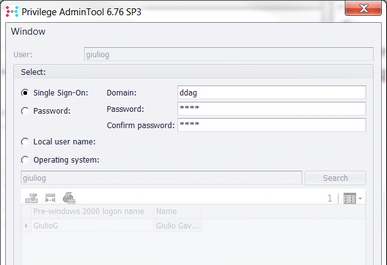
Single Sign-On: the user can connect to the database with Single Sign-On, which has a higher level of security. As the matter of the fact a password is stored and encrypted with crypto package .NET in the database´s
instance and it is decoded only at the run time.
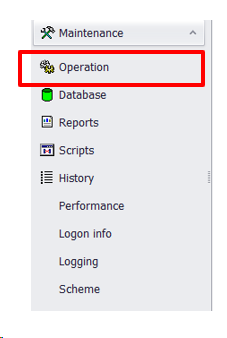
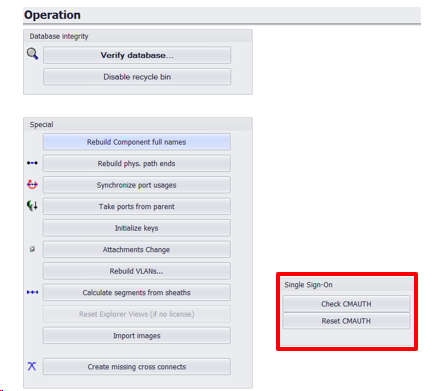
The AdminTool user can also check the password and in case reset it. For this purpose there are two buttons in the area Maintenance/Operation
GIS type
If the box in the column GIS type is checked, the user can modify the GIS data. Please note that, if the user´s
type is set on “viewer” this box is automatically ticked off, as a viewer is not allowed to change GIS datas.
RNP
Ticking the box in RNP column the user is enabled for the Network Planner.
Fixed License
Checking the box in this column, a unique refence between the user and the license is built, so that this user
always the same license.
Explorer-Views
With this row you have the possibility to hide some location systems for a user, who is not interested viewing them in ConnectMaster. As a result, the Explor-view is easier and friendlier.
Description
The description allow you to input more information about the user. For example name and surname of a user can be a not trivial information, expecially when the user name is not meaningful (i.e. USER0815, USER4711)
Save
In order to save the changes click please on the icon ![]() and the please check the user clicking on the icon
and the please check the user clicking on the icon ![]() .
.
Please keep in mind that a double check on the user is also necessary when you load a dump in a new database.